Basic Downloads
FaxDesk
FaxDocs
FaxUp
FaxTrack
WebForms
WLink
Bot Portfolio
Discord Whitelist
Markdown Guide
Weblutions Documentation > Product Documentation > WLink > WLink Installation
WLink Installation
This page will go over the installation steps for WLink - The Easy to use URL Shortener. Make sure you have all the prerequisites outlined in parent article.
Before continuing with the installation make sure you have installed a LEMN Stack onto your server. This page will continue on with the configuration of the product.
Uploading Files
Using WinSCP Upload the files for WLink to /home/wlink.
Once the files are uploaded we'll continue with the SQL database setup.
Database Setup
First login to MySQL using the below command
mysql -u root -p
Enter your MySQL password
Now import the database from our uploaded files
source /home/wlink/install.sql
Now you can use the exit command to leave MySQL as it has created a wlink database for us.
Domain Setup
Now we want to make sure our domain is connected to WLink. Navigate to /etc/nginx/sites-available and create a new file with your domain name.
Once done put the following content inside of the new file and save, change the relevant content.
server {
  server_name example.com; # Change domain to your domain

  location / {
    proxy_pass http://localhost:3000; # Change the port if needed.
    proxy_http_version 1.1;
    proxy_set_header Upgrade $http_upgrade;
    proxy_set_header Connection 'upgrade';
    proxy_set_header Host $host;
    proxy_cache_bypass $http_upgrade;
    proxy_set_header X-Real-IP $remote_addr;
  }
    error_page 502 /502.html;
    location = /502.html {
        root  /home/wlink/public;
    }
}
Restart Nginx
sudo systemctl restart nginx
Enable the new website by using
ln -s /etc/nginx/sites-available/example.com /etc/nginx/sites-enabled
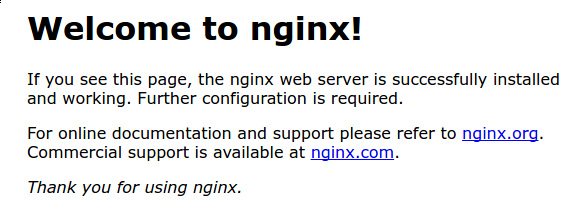
Ensure that you can now access the server through the domain, it should display the below

Now we install our SSL certificate. Change the domain to contain your own.
sudo certbot --nginx -d example.com
To automatically refresh the certificates when they expire use
sudo certbot renew --dry-run
Node Setup
Now it's time to configure our WLink config file. Navigate to /home/wlink/config.json and edit it to your liking, ensure that you place a Discord Id and token for OAuth which can be obtained on the Discord developer portal. For help see Discord OAuth Redirects.
The redirect URI for WLink is:
https://example.com/auth/discord/callback
Change to your domain.
Now create a screen session and change the directory to WLink using
cd /home/wlink
Now install the packages required using
npm install
This will load all the packages and create a node_modules folder.
Now start WLink!
node .
Related Articles
Review this page
wlink setup wlink install
1 recommend this page